|
|
||
|---|---|---|
| .. | ||
| 0p.png | ||
| 1circle.png | ||
| 1ring.png | ||
| 2p.png | ||
| 4p.png | ||
| 7p.png | ||
| 10p.png | ||
| 20p.png | ||
| 30p.png | ||
| 40p.png | ||
| 50p.png | ||
| 60p.png | ||
| 70p.png | ||
| 80p.png | ||
| 90p.png | ||
| 100p.png | ||
| ChangeLog | ||
| README.md | ||
| app-icon.js | ||
| app.js | ||
| app.png | ||
| calc_precentages.js | ||
| metadata.json | ||
| screenshot_thering1.png | ||
| screenshot_thering2.jpg | ||
| screenshot_thering3.jpg | ||
README.md
The Ring
A proof of concept clock with large ring guage for steps using pre-set images, acts as a tutorial piece for discussion
Written by: Hugh Barney For support and discussion please post in the Bangle JS Forum
- The ring is a proof of concept to establish a clean way to draw a large ring guage with few aliasing issues and artifacts.
- Rather than use grahics commands to draw the ring a series of fixed images are used.
- This allows for better accuracy of the initial image and also does not suffer from performance issues.
- The downside is that more storage and memory is used to hold the initial images. This is not an issue on a Bangle 2.
- The ring effect is constructed from 14 images that represent a range of different percentages
- The percentages of the images are 0,2,4,7,10,20,30,40,50,60,70,80,90,100%
- The app is not intended to be enhanced further (apart from bug fixes) but rather as code that can be reused in other apps
- The full set of original images are included in the source code to demonstrate the concept
- I will use this code to build a new clock similar to Pastel but using this ring guage for steps. The new clock will use more attractive fonts and provide a settings meu to change the primary color of the ring.
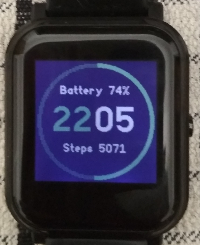
Screenshots
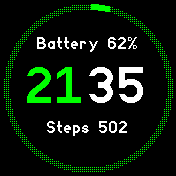
It is worth looking at a photograph of the clock in action as the screenshot does not do the final effect justice.
Production
- I first generated a circle on black background using The Gimp image editor. I used this Youtube video to get started. The initial image is 178x178 pixels.
- I then drew another smaller black circle over the top of the original to make a ring
-
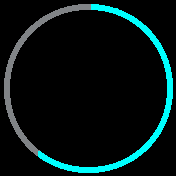
From the empty ring image I coloured segments of the ring and saved new images at specific percentages
-
I used the file
calc_percentages.jsto work out the x and y coordinates of the end point of each percentage position along the ring. -
The Image Converter was used, set to 2-bit optimal, transparency Y, compression Y and ImageObject Y, to convert each PNG file to code.
-
NOTE that the generated image object pallete seemed to switch the order of the colors from 50% onwards.
-
The greying out of the unused part of the ring is acheived by using a dithered color. So if the ring colour is green #0f0 then the greyed out part is done in '#020'.
Stages of The Ring
Below are some examples of the different stages of the ring